VRC Stocking Generator Manual
VRC Stocking Generator is a Unity editor extension for creating stockings from an avatar body. It can create knee-high stockings, pantyhose, full body tights, arm stockings, and custom cut shapes using exclusion colliders.
Installing Modular Avatar and lilToon is recommended. If Modular Avatar is not installed, Blendshape Sync and Merge Armature are not configured. If lilToon is not installed, the materials used by the presets cannot be loaded.
Basic Usage
- Open the tool from
Tools > Stocking Generator. - Assign the avatar body's
Skinned Mesh RenderertoBody > Skinned Mesh Renderer. - Choose a preset or assign your own material in the
Materialsection. - Click
Generate Stocking. - A stocking is generated. Adjust colors or mask settings as needed, then generate again until the result looks right.
The generated stocking object is created next to the source body object in the hierarchy. Meshes, textures, materials, and prefabs are saved to the selected output folder.
Examples
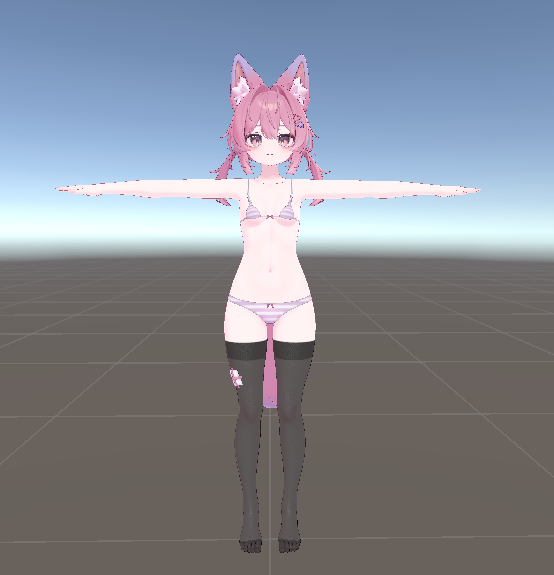
- Knee-high stockings
How to make this
Set Mask Mode to KneeHigh, then adjust Stocking Height Offset as needed.
- Pantyhose
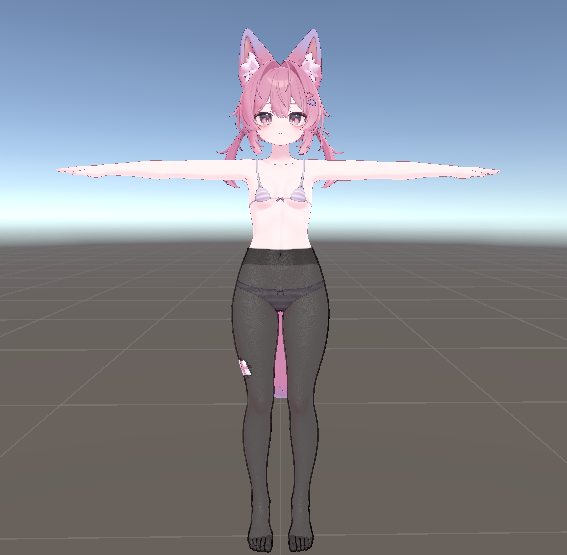
How to make this
Set Mask Mode to Pantyhose, then adjust Stocking Height Offset as needed. If underwear clips through the stocking, slightly increase Output > Advanced Settings > Normal Offset.
- Arm stockings
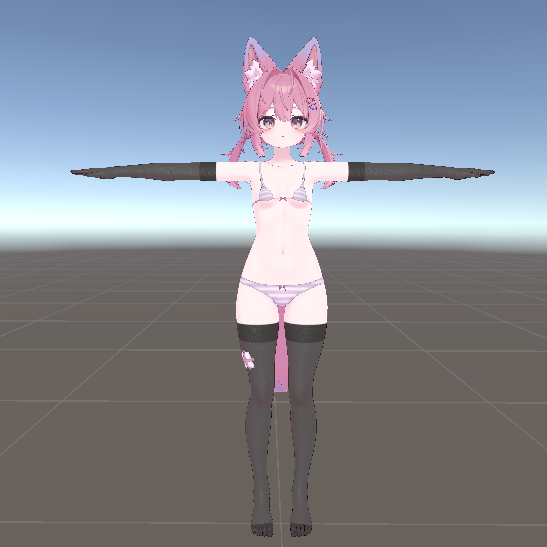
How to make this
Enable Arm Stocking, then adjust Arm Length Offset as needed.
- Full body tights
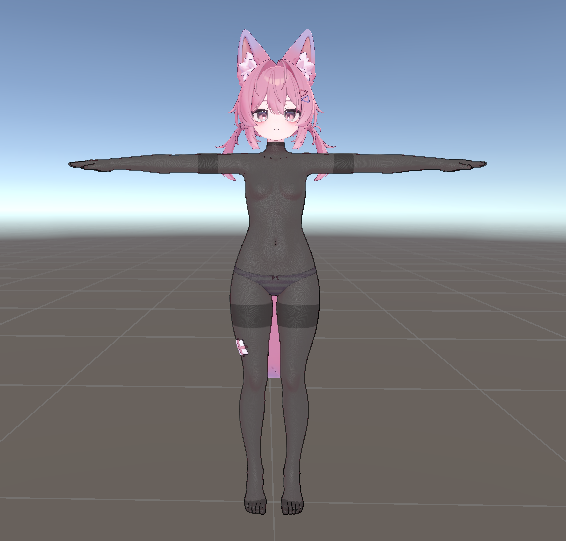
How to make this
Enable Full body tights, then use Neck Mask if you want to cut the mask around the neck. When knee-high, pantyhose, or arm stocking boundaries are enabled, the boundary areas are darkened.
- Asymmetric or single-side knee-high / arm stockings
How to make this
Enable Separate left/right height offsets, then adjust each side. To generate only one side, disable the side you do not want with Right KneeHigh, Left KneeHigh, Right Arm Stocking, or Left Arm Stocking.
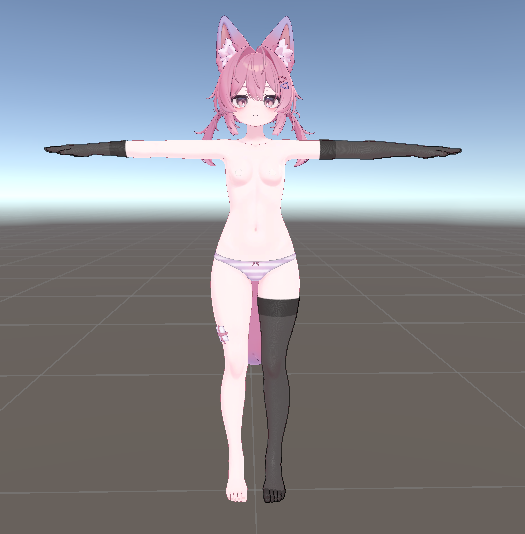
- Fishnet tights
How to make this
Enable Fishnet Pattern, then adjust Fishnet Cell Size, Fishnet Line Width, and Fishnet Around Cells as needed.
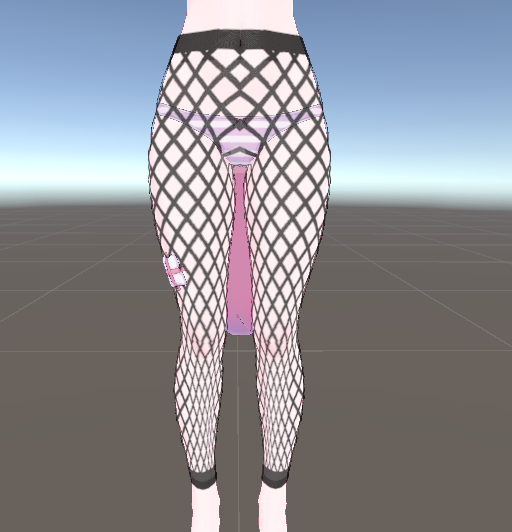
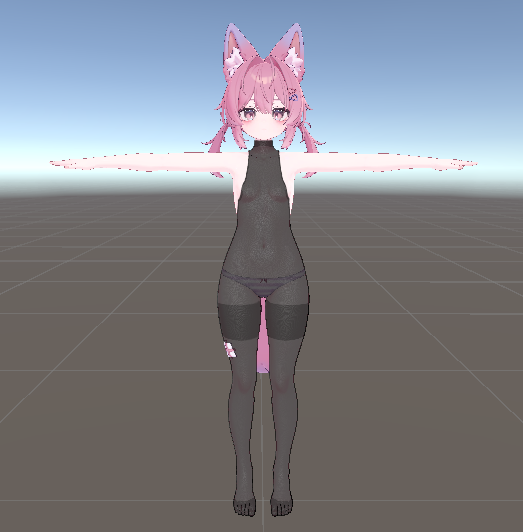
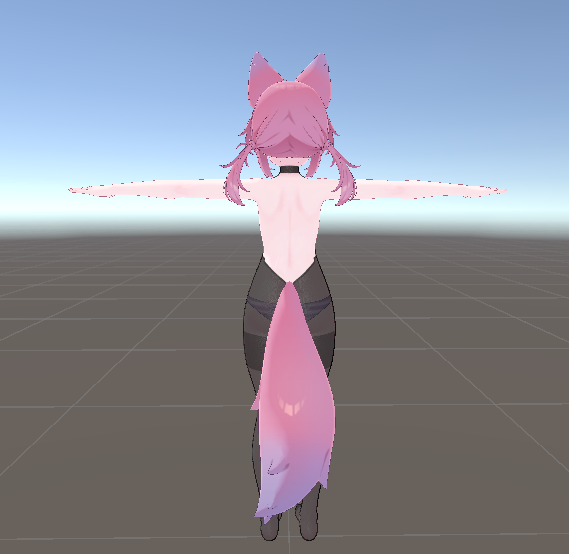
- Sleeveless tights
How to make this
Use Exclusion Colliders.
Enable Full body tights, then enable Neck Mask. Add an empty GameObject to the hierarchy, then add several empty GameObjects under it. Add sphere, capsule, and box collider components to the child objects.
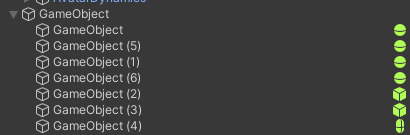
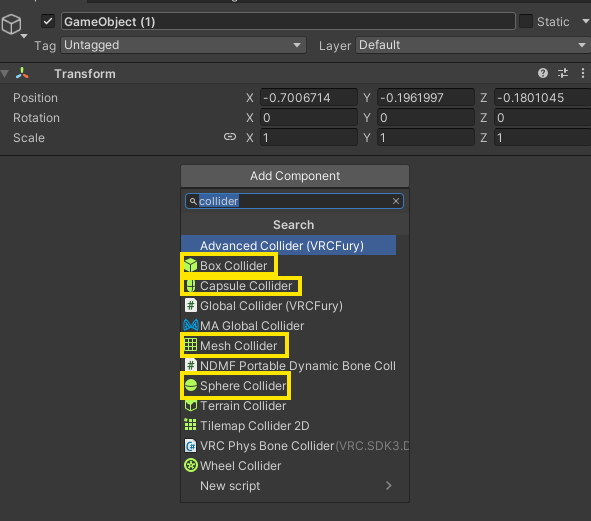
Cover the arms with sphere colliders, the sides with capsule colliders, and the back with a box collider to create a clean sleeveless shape. Adjust collider position and size until the arm openings match the shape you want.
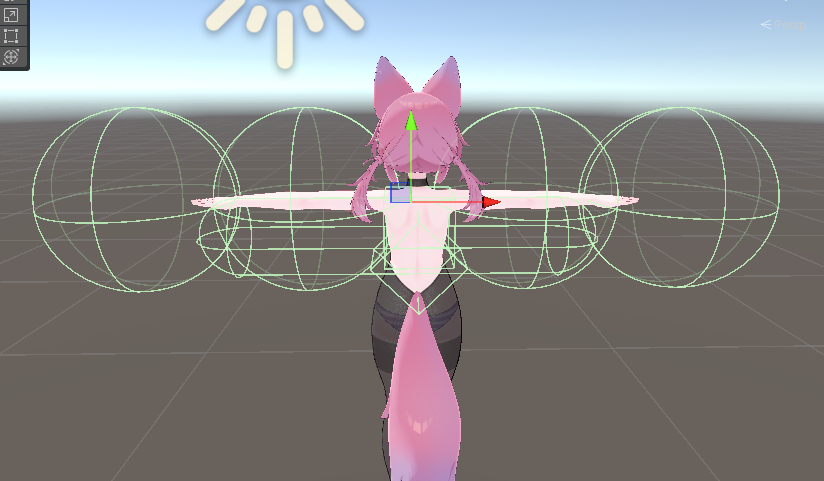
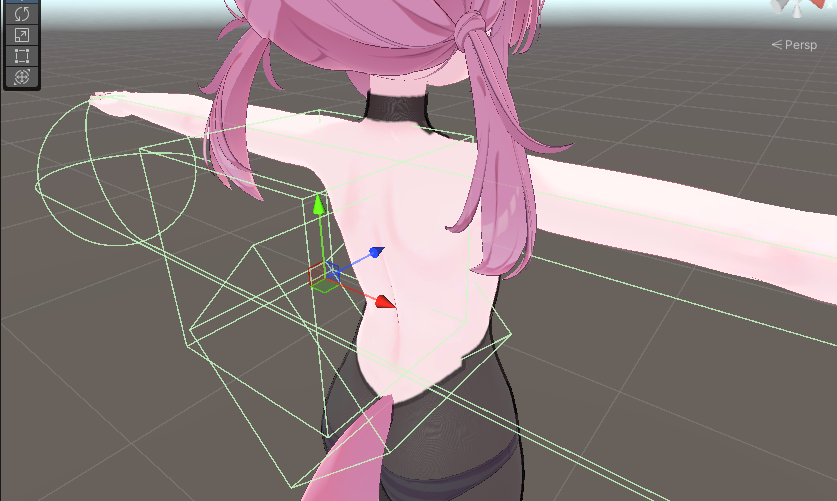
Enable Exclusion Colliders, assign the root object of the colliders to Root, and adjust Dark Length to control the dark edge around the arm openings.
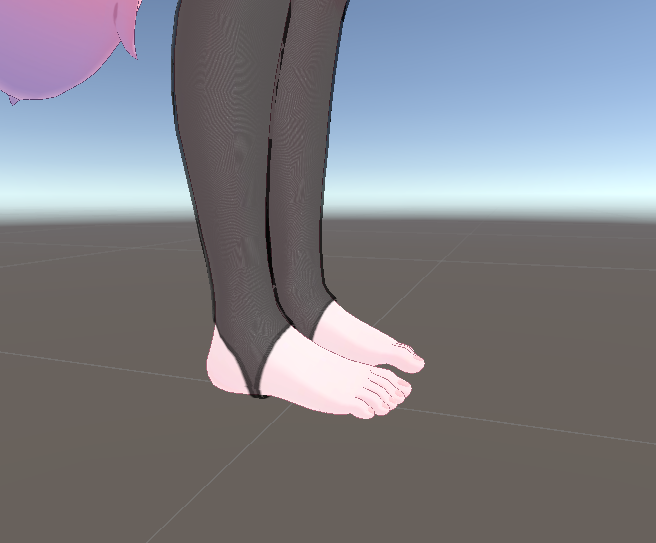
- Cut out the heel and toes
How to make this
Use Exclusion Colliders.
Add a GameObject to the hierarchy, then add child objects with capsule colliders. Place the capsule colliders side by side.

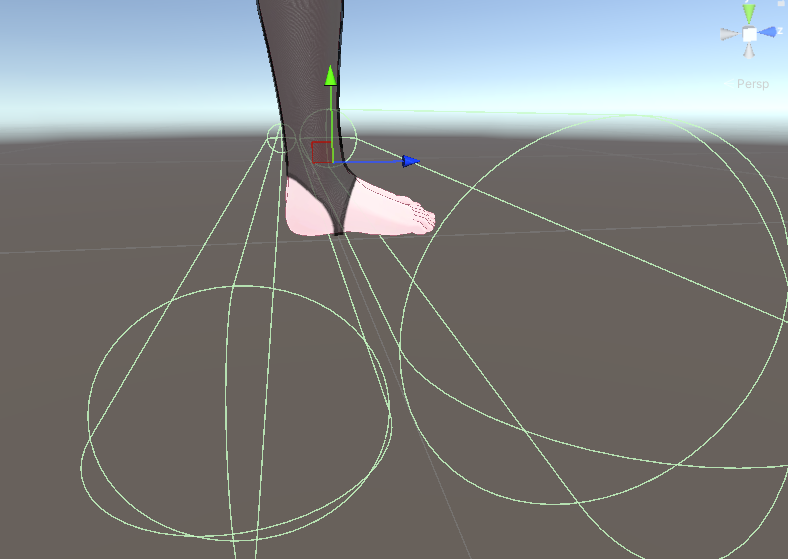
Enable Exclusion Colliders, assign the root object of the colliders to Root, and adjust Dark Length to control the dark edge around the heel and toe cuts.
- Torn tights
How to make this
Use Exclusion Colliders.
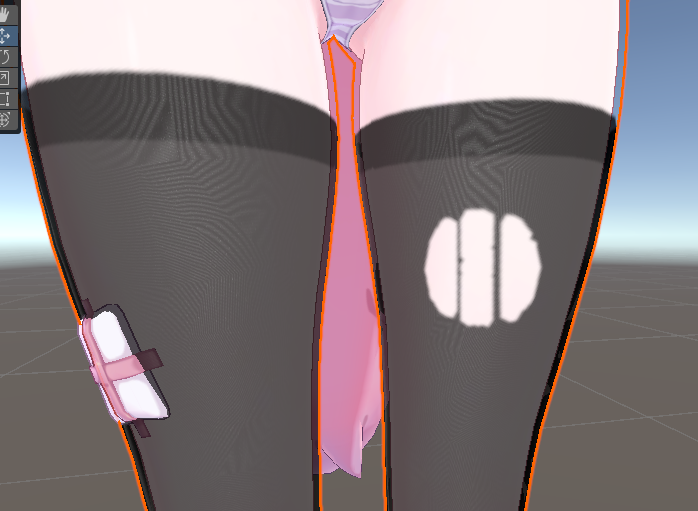
Add Assets/ranhai613/StockingGenerator/Colliders/ripping_mold.prefab to the hierarchy. It contains multiple mesh colliders as child objects. Move and resize them to create the torn shape. Be careful when mesh colliders are too close to each other, because the removed areas may connect.
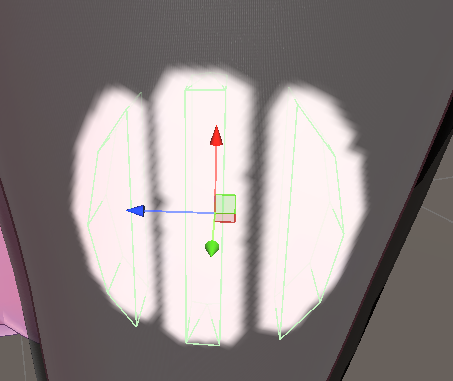
Enable Exclusion Colliders, assign the root object of the colliders to Root, and set Dark Length to 0. If you are also using dark edges for other cutout areas, enable 2nd Root, assign the root for the torn tights, and set 2nd Dark Length to 0.
Changing Colors
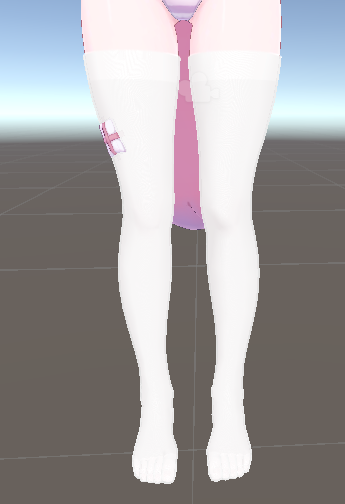
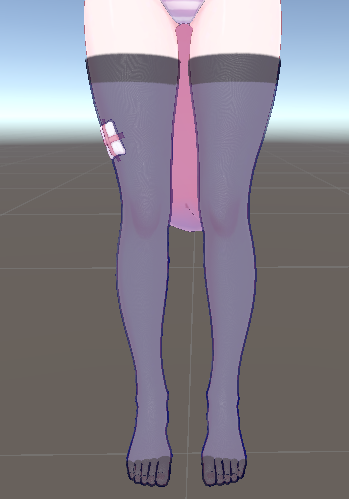
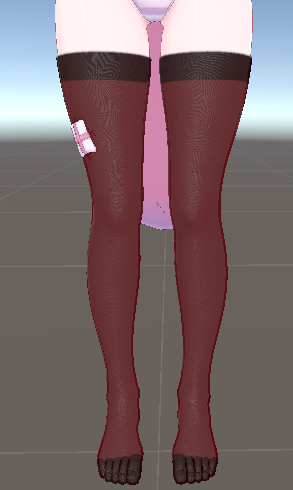
Stocking colors can be changed in the Stocking Color section. Normal Color is the base stocking color, and Dark Color is used for darker areas such as boundaries and toes. When you select Material > Preset, these colors are also updated to match the preset.
Color Preset Examples
- White
- Navy
- Wine red
Using Your Own Material
Select Custom in the Material section to assign your own material for stocking generation. When the stocking is generated, the selected material is copied, then the generated main color texture and alpha mask texture are assigned to the copy. The original material is not modified.
Using Other Shaders
lilToon is supported by default. Other shaders, such as Poiyomi, may also work, but full compatibility is not guaranteed because texture assignment differs by shader. If automatic assignment fails, manually assign the generated texture and alpha mask to the copied material. By default, generated textures are saved under Assets/ranhai613/StockingGenerator/Generated.
Limitations
- Rigs other than Humanoid bones are not guaranteed to work.
- Stocking boundaries may look rough when viewed up close. Increasing
Material > Advanced Settings > Main Color Texture SizeorStocking Alpha Mask > Advanced Settings > Mask Texture Sizemay improve the result. - Because the body mesh is used directly, feet may look like five-toe socks.
- Sharp mesh parts such as nails may fail to connect cleanly. Nail meshes may also overlap and make the color look unnaturally dark.
Field Reference
| Field | Description | ||||||||||||||||||||||||||||||||||||||||||||||||||||||||||||||||||||||||||||||||
|---|---|---|---|---|---|---|---|---|---|---|---|---|---|---|---|---|---|---|---|---|---|---|---|---|---|---|---|---|---|---|---|---|---|---|---|---|---|---|---|---|---|---|---|---|---|---|---|---|---|---|---|---|---|---|---|---|---|---|---|---|---|---|---|---|---|---|---|---|---|---|---|---|---|---|---|---|---|---|---|---|---|
UI Language |
Selects the editor UI language. | ||||||||||||||||||||||||||||||||||||||||||||||||||||||||||||||||||||||||||||||||
Body |
Sets the source body used for stocking mesh and mask generation. The source renderer must have a valid mesh.
|
||||||||||||||||||||||||||||||||||||||||||||||||||||||||||||||||||||||||||||||||
Material |
Configures the material used for the generated stocking and the generated main color texture.
|
||||||||||||||||||||||||||||||||||||||||||||||||||||||||||||||||||||||||||||||||
Stocking Color |
Adjusts the base stocking color and darker details around boundaries and toes.
|
||||||||||||||||||||||||||||||||||||||||||||||||||||||||||||||||||||||||||||||||
Stocking Alpha Mask |
Configures the alpha mask that controls where the stocking is visible.
|
||||||||||||||||||||||||||||||||||||||||||||||||||||||||||||||||||||||||||||||||
Output |
Configures the generated object name, output location, mesh processing, and export options.
|
Advanced Usage: Exclusion Colliders
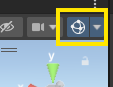
Exclusion Colliders remove fabric inside the specified collider volumes. They are useful when the automatic mask includes areas you want to remove, or when you need clean custom cuts around complex shapes. Enable Gizmos in the upper-right of the Scene view to see colliders while editing.
Basic Workflow
- Create an empty GameObject near the avatar.
- Add empty GameObjects under it, add collider components to those child objects, and place the colliders so they cover the areas to remove.
- Enable
Exclusion Collidersin the tool. - Assign the parent object to
Root.
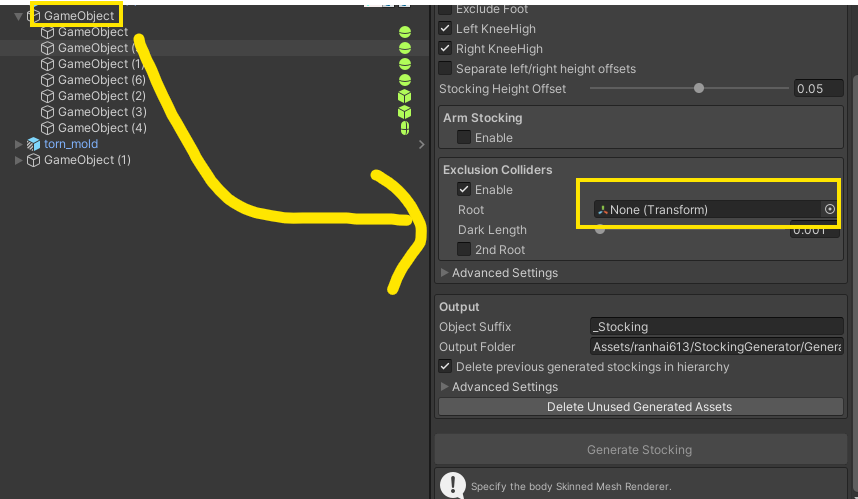
- Adjust
Dark Lengthto control the dark fabric edge around the removed area. - Generate the stocking and check the result.
Only enabled colliders on active GameObjects are used. Target colliders are collected from the root and its children.
Using 2nd Root
Use 2nd Root when one collider group and another collider group need different dark boundary widths. For example:
- Root: use the normal
Dark Lengthfor large exclusion areas. - 2nd Root: use a
Dark Lengthof 0 for holes, torn fabric, or similar cutout areas.
Both roots remove pixels from the alpha mask. Their dark boundary widths are applied separately to the generated main color texture.
Tips
- Use simple collider shapes where possible. They are easier to adjust and preview.
- For mesh colliders, enabling
Convexmay simplify the collider shape and change the removed area. - Increasing the texture size makes exclusion collider edges more accurate.
- If nothing changes, confirm the collider GameObject is active and the Collider component is enabled.
Q&A
Stocking generation takes too long.
Possible causes include large texture sizes, high smoothing iteration counts, or enabling Apply Smooth Iterations to each BlendShape frame (slow). Lowering these settings will shorten generation time. When adjusting the result, it is also recommended to reduce texture sizes to something like 1024, then increase them only for the final output.
- Reduce
Material > Advanced Settings > Main Color Texture SizeandStocking Alpha Mask > Advanced Settings > Mask Texture Size. - Reduce
Output > Advanced Settings > Smooth Iterations. - Disable
Output > Advanced Settings > Apply Smooth Iterations to each BlendShape frame (slow).
The Generate Stocking button is disabled. What should I check?
Make sure Skinned Mesh Renderer is assigned, the renderer has a mesh, and a valid material is assigned.
The generated mask is empty or missing. Why?
The source mesh may not have UV0, the expected bones may not be found, or the selected Mask Mode may not match the avatar rig. Try another Mask Mode, confirm the mesh has UVs, and check the Console for StockingGenerator warnings.
Underwear clips through the body. What should I do?
Slightly increase Normal Offset.
Why are BlendShapes not matching perfectly?
Enable Apply Smooth Iterations to each BlendShape frame (slow) when using smoothing. This takes longer but can make blend shape deformation more consistent.
How do I make only arm stockings?
Set Mask Mode to Naked, enable Arm Stocking, then enable the left and/or right arm options.
How do I make pantyhose or full body tights?
Use Mask Mode > Pantyhose for lower body pantyhose. Enable Full body tights for a full body style, then optionally enable Neck Mask to cut around the neck.
The foot area should be bare. Which option should I use?
Enable Exclude Foot, then adjust Foot Boundary Offset until the cut is in the desired position.
Exclusion Colliders do not affect the result. What should I check?
Confirm Exclusion Colliders is enabled, Root is assigned, the collider GameObjects are active, and each Collider component is enabled. Also make sure the colliders actually overlap the body mesh area you want to remove.
When should I use 2nd Root?
Use it when you need two collider groups with different dark boundary widths. If both groups can share the same dark edge width, one root is enough.
Where are generated assets saved?
They are saved in Output Folder. By default, this is Assets/ranhai613/StockingGenerator/Generated.